.NetCore2.2(ASP)の実行環境をDocker(CentOS7 + MySql + Apache)で作成してみた。
こんにちはハラダITサポート代表の原田です。
昔Monoプロジェクトをいじっていた頃はMicrosoftがオープンソースで.NetFrameworkを公開するなんて思っていませんでしたが、時代は変わるもんですね。
というわけで、ASP.NetCore2.2の実行環境をDockerで作ってみました。
開発環境を想定していますので、サイトを複数楽に追加できるように考えています。
1.準備
うちのサイトの機能はすべてDockerで作られていてそれをdocker-composeで管理しているので、そこに今回作成するDockerfileを組込んでイメージとかコンテナとかを作ります。
docker-compose.yml
80/tcpはすでにこのWebで使っていますので、8082/tcpで公開するようにしました。
volumesにある3つはそれぞれ永続化が必要なフォルダです。
dotnet_httpd : apacheの設定を保持する。
dotnet_web : このフォルダ以下にWebアプリを公開する。
dotnet_services : kestrelサーバ実行用サービスファイルを保持する。
※mysqlのデータを永続化する場合は追加が必要です。
  dotnet:
    container_name: dotnet
    build:
      context: ./dotnet
      dockerfile: Dockerfile
    restart: always
    privileged: true
    ports:
      - 8082:80
    volumes:
      - dotnet_httpd:/etc/httpd/conf.modules.d
      - dotnet_web:/var/www/dotnet
      - dotnet_services:/dotnet/services

  dotnet_httpd:
    driver_opts:
      type: none
      device: /dotnet/data/httpd
      o: bind
  dotnet_web:
    driver_opts:
      type: none
      device: /dotnet/data/web
      o: bind
  dotnet_services:
    driver_opts:
      type: none
      device: /dotnet/data/services
      o: bind
フォルダ構成
docker-compose.yml
dotnet/
├ Dockerfile
├ conf/
└ script/
├ init_mysql.sh -- mysqlの初期化スクリプト
└ set_service.sh -- servicesフォルダにあるserviceファイルを起動するスクリプト
└ data/
├ httpd/
├ services/
└ web/
Dockerfile内容
# VERSION: 1.0.0
# AUTHOR: takaha@HITS
# DESCRIPTION : dotnetcore container
# BUILD: docker build --rm -t dotnet .

FROM centos:7

# Set arguments
ARG MYSQL_PASSWORD=MYSQLに設定したいルートパスワード

# .NetCore, Apache, expect, mysql8のインストールとフォルダ作成
RUN rpm -Uvh https://packages.microsoft.com/config/rhel/7/packages-microsoft-prod.rpm && \
    yum -y update && \
    yum -y install dotnet-sdk-2.2 httpd mod_ssl expect && \
    yum -y localinstall https://dev.mysql.com/get/mysql80-community-release-el7-3.noarch.rpm && \
    yum -y install mysql-community-server && \
    yum clean all && \
    systemctl enable mysqld && \
    systemctl enable httpd && \
    mkdir -p /var/www/dotnet && \
    mkdir -p /dotnet/services

# 初期設定用スクリプトのコピー
COPY conf/script/set_service.sh /dotnet
COPY conf/script/init_mysql.sh /

# MYSQLの設定と起動設定
RUN sed -i '$a default-authentication-plugin=mysql_native_password' /etc/my.cnf && \
    sed -i '$a /init_mysql.sh' /etc/rc.d/rc.local && \
    sed -i '$a /dotnet/set_service.sh' /etc/rc.d/rc.local && \
    sed -i 's/\[NEW_PASSWORD\]/'$MYSQL_PASSWORD'/' /init_mysql.sh && \
    chmod 755 /etc/rc.d/rc.local && \
    chmod +x /init_mysql.sh && \
    chmod +x /dotnet/set_service.sh && \
    chown -R mysql /var/lib/mysql

CMD /sbin/init
ちょっと解説
Dockerfileで作成している以下の2つのフォルダはdocker-compose.ymlで関連付けされています。
-/var/www/dotnet の下に各アプリケーションが配置します。
-/dotnet/services の下に各アプリケーションのkestrelサーバ起動用サービスを配置します。
# MYSQLの初期設定と起動設定の部分はMYSQLの初期設定と初期設定用スクリプトをrc.localに登録しています。
スクリプトファイルの内容
set_service.sh
#!/bin/bash

while read -d $'\0' file; do
    service=$(echo "${file}"|sed 's!^.*/!!'|sed 's/\..*//')
    cp  $file /etc/systemd/system/
    systemctl enable $service
    systemctl start $service
done < <(find /dotnet/services -mindepth 1 -maxdepth 1 -print0)
解説
/dotnet/servicesフォルダ内の全ファイルを/etc/systemd/system/フォルダへコピーし、サービスを起動します。
init_mysql.sh
#!/bin/bash

new_pwd="[NEW_PASSWORD]"
init_pwd=$(cat /var/log/mysqld.log | grep root | sed 's/.*root@localhost: //')

expect -c "
set timeout 5
spawn mysql_secure_installation
expect {
    \"Enter password for user root:\" {
        send \"${init_pwd}\n\"
        exp_continue
    }
    -re \"(Re-enter new|New) password:\" {
        send \"${new_pwd}\n\"
        exp_continue
    }
    -re \"(Change the password for root|Disallow root login remotely)\" {
        send \"n\n\"
        exp_continue
    }
    \"Press y|Y for Yes\" {
        send \"y\n\"
        exp_continue
    }
}
"
解説
expectを使用してmysql_secure_installationを実行しています。
Disallow root login remotelyにNo回答しているので、リモートでもrootが使用できます。セキュリティ上問題となる可能性があるので気になる場合はスクリプトを修正してください。
Dockerfileをビルドする時new_pwd="[NEW_PASSWORD]"の箇所にパスワードがセットされます。
コンテナ起動した後も/init_mysql.shが存在するのでmysqlのパスワードはコンテナに入れる人には見られてしまいます。気になる人は修正してみてください。単純に考えると初期化後に削除してしまえばいいだけの気がします。(rc.localの起動部分も)
イメージ作成と起動
docker-compose.ymlファイルが置いてあるフォルダに移動して下記のコマンドを実行します。
$ docker-compose build dotnet   # イメージ作成
$ docker-compose up -d          # コンテナ作成と起動
buildコマンドはDockerfileが変更されていた場合は変更された箇所以降がビルドされます。
もし全て再作成したい場合はキャッシュを使用しないでビルドするか、イメージを削除(docker image rm 名前)してからビルドすればよいです。(私はいつもイメージを削除してしまいます)
2.Webサイトの追加方法
流れでいうと、4Stepです。
1. 公開フォルダへファイルを配置する。
2.Servicesフォルダへkestrel起動サービスファイルを作成する。
3.apacheに仮想ホストを登録する。
4.コンテナを再起動する。
※4についてはApacheとkestrelサーバの起動でも代用できますが面倒なのでコンテナ再起動しています。
サンプルWebの作成から公開までの一連の流れを解説しておきます。
サンプルWebの作成
ここ参照
# プロジェクトを作成するフォルダに移動してから下記のコマンドを実行する。
$ dotnet new webApp -o myWebApp --no-https
Welcome to .NET Core!
---------------------
Learn more about .NET Core: https://aka.ms/dotnet-docs
Use 'dotnet --help' to see available commands or visit: https://aka.ms/dotnet-cli-docs

Telemetry
---------
The .NET Core tools collect usage data in order to help us improve your experience. The data is anonymous and doesn’t include command-line arguments. The data is collected by Microsoft and shared with the community. You can opt-out of telemetry by setting the DOTNET_CLI_TELEMETRY_OPTOUT environment variable to '1' or 'true' using your favorite shell.

Read more about .NET Core CLI Tools telemetry: https://aka.ms/dotnet-cli-telemetry

ASP.NET Core
------------
Successfully installed the ASP.NET Core HTTPS Development Certificate.
To trust the certificate run 'dotnet dev-certs https --trust' (Windows and macOS only). For establishing trust on other platforms refer to the platform specific documentation.
For more information on configuring HTTPS see https://go.microsoft.com/fwlink/?linkid=848054.
Getting ready...
The template "ASP.NET Core Web App" was created successfully.
This template contains technologies from parties other than Microsoft, see https://aka.ms/aspnetcore-template-3pn-210 for details.

Processing post-creation actions...
Running 'dotnet restore' on myWebApp/myWebApp.csproj...
  Restore completed in 1.99 sec for /root/dev/myWebApp/myWebApp.csproj.

Restore succeeded.  # <= 成功

# 作成したサンプルWebフォルダの中へ移動する。
$ cd myWebApp
Defaultのポートは5000で動作するので複数サイトを動作させる場合は以下のように実行ポートを変更する必要があります。
# 実行ポートの変更方法(default -> 5002へ変更)
$ vi Program.cs
...
namespace myWebApp
{
    public class Program
    {
        public static void Main(string[] args)
        {
            CreateWebHostBuilder(args).Build().Run();
        }

        public static IWebHostBuilder CreateWebHostBuilder(string[] args) =>
            WebHost.CreateDefaultBuilder(args)
                .UseUrls("http://localhost:5002")    // これを追加
                .UseStartup<Startup>();
    }
}
発行
# VisualStudioを使用する場合は『ビルド -> xxxxの発行』から発行できます。
# Linux上で発行する場合は発行したいプロジェクトファイルが存在するフォルダに移動してから、以下のコマンドを実行します。
$ dotnet publish -c Release
Microsoft (R) Build Engine version 16.1.76+g14b0a930a7 for .NET Core
Copyright (C) Microsoft Corporation. All rights reserved.

  Restore completed in 287.68 ms for /dev/myWebApp/myWebApp.csproj.
  myWebApp -> /dev/myWebApp/bin/Release/netcoreapp2.2/myWebApp.dll
  myWebApp -> /dev/myWebApp/bin/Release/netcoreapp2.2/myWebApp.Views.dll
  myWebApp -> /dev/myWebApp/bin/Release/netcoreapp2.2/publish/
公開フォルダへコピー
# 作成されたファイルを公開フォルダへコピーします。
$ cd bin/Release/netcoreapp2.2/
$ mkdir -p /var/www/dotnet/myWebApp
$ cp -a ./* /var/www/dotnet/myWebApp/
# VisualStudioの場合はftpや何かを使ってサーバにアップロードしてください。
kestrelサーバ起動サービスの作成
$ vi /dotnet/services/kestrel-myWebApp.service
[Unit]
Description=Example service file for ASP.NET Core application.

[Service]
WorkingDirectory=/var/www/dotnet/myWebApp
ExecStart=/usr/bin/dotnet /var/www/dotnet/myWebApp/myWebApp.dll
Restart=always
# Restart service after 10 seconds if the dotnet service crashes:
RestartSec=10
SyslogIdentifier=dotnet-mywebapp
User=apache
Environment=ASPNETCORE_ENVIRONMENT=Production

[Install]
WantedBy=multi-user.target
Apacheの仮想ホスト設定
$ vi /etc/httpd/conf.modules.d/vhost.conf  # ファイル名はなんでもよい
# 以下の内容を追記
<VirtualHost *:80>
    ProxyPreserveHost On
    ProxyPass / http://127.0.0.1:5002/         # <= 公開ポート番号を指定
    ProxyPassReverse / http://127.0.0.1:5002/  # <= 同上
    ServerName app2.harada-its.com             # <= DNSで引けるようにしておく
#    ServerAlias *.harada-its.com 使わない
    ErrorLog ${APACHE_LOG_DIR}hellomvc-error.log
    CustomLog ${APACHE_LOG_DIR}hellomvc-access.log common
</VirtualHost>
コンテナの再起動
$ docker-compose restart dotnet動作確認
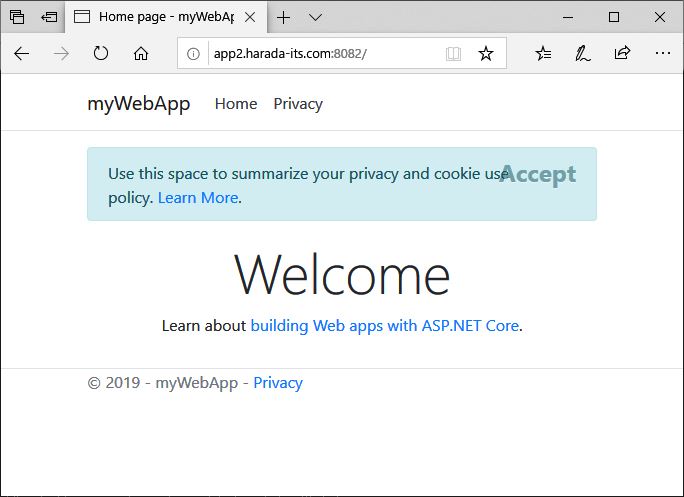
URL:http://app2.harada-its.com:8082 にアクセスするとサンプル画面が表示されます。
※コンテナの再起動後、30秒程度起動するのに時間がかかるかも。
他のサイトにアクセスしたい場合はapp2の部分を適宜変更してください。
ちょっと長くなりましたが、いかがでしたでしょうか?
何かあればお気軽にコメントください。
あなたの猫の手になりたいHarada IT Support代表の原田でした。
Follow me!